Animal bulletin board DIY
Supplies:
cork board
outside fabric (pretty fabric)
backing of some sort ( felt, poster board, cardboard)
tacky glue
Laptop with printer
Glue gun
scissors

First you need to pick your image. It doesn't have to be an animal it can be a shape or a silhouette. I will now explain how you get the image
1. go to google images and figure out what image you want for a board. I would recommend something with not a hole lot of detail that would work best. Type in the google search your silhouette you are looking for take for example I typed in elephant silhouette.
2. Once image is picked save it to your desktop for easy excess
3. Open up paint on your computer and post the image in it. The reason we are using paint is because if you are anything like my mother you don't want to waist a ton of ink so we are going to white out the middle of the picture and keep the outline. To white out the middle is very simple.
4. Go to the paint bucket and select it. Than you will need to select the white color drag the paint bucket over to the middle of the image and click it. While doing this if by change it whites out part of your outline just simply get the draw tool and draw the line back in. If it does not white out the hole thing get the paint brush and you will have to do it manually
The complicated part is almost over I promise
5. Now that the image is just the outline save it back to your desktop.
6. Open Microsoft office and copy your picture from your desktop to office.
7. Now we need to blow the image up so it is a big enough space to hole any of the things you want to put on the board so to do that we will spread the image out onto 4 different sheets. Once you have the image in office you will change the layout to 13.898
x 9.843.
8. this will spread the image onto 4 different pieces of paper to blow it up. Spread the image as large as you can on the sheet than go to print preview to see if that is how big you want it.
9. Print out the 4 sheets
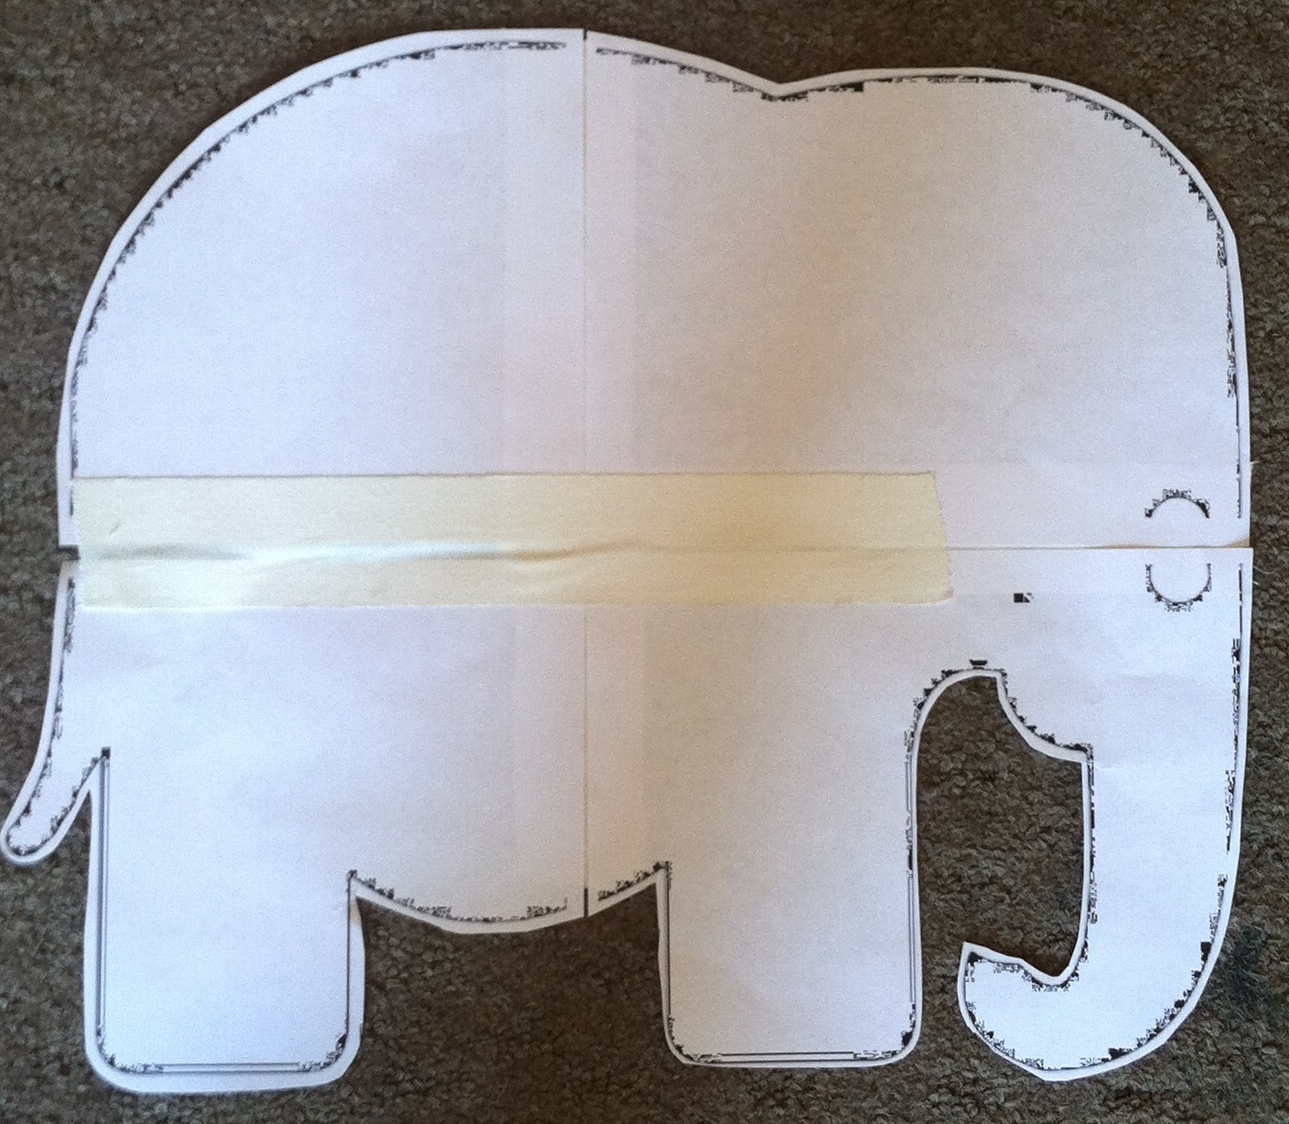
10. Now time to use those skills you learned back in second grade. cut the silhouette out.

11. Trace image onto cork board


13. Cut both fabric and cork board out
14. Cover the cork board in tacky glue. Make sure you don't drown the cork board in the glue because then it will soak threw the fabric and make spots that look like grease stains.
.JPG)
15. Flip cork board over. Start cutting slits into the excess fabric all way around the hole thing .

Like this ^

16. Take your hot glue gun and glue down all of the fabric pieces on the side of the cork board that there is no fabric. Try to move with the fabric so that way the edges stay nice and crisp with no gathering of any type.

This is what it will look like when it is done^
17. clue your cork board down onto your backing of choice and cut around the edges for a nice clean finish. ( I chose cardboard makes it really sturdy)

Viola!
No comments:
Post a Comment