Showing posts with label DIY. Show all posts

Sunday, July 20, 2014

DIY: Waitress Apron


DIY: Waitress Apron

Supplies:
  • Fabric (I chose two contrasting fabrics)
  • Scissors 
  • Sewing machine or strong glue 
  • Ribbon
  • Iron

I like many other teenagers work to put gas into our vehicles and because we have no experience in anything big and important we are forced to work minimum wage jobs.  I am one of those teenagers... 

Personally I love waitressing but if you do not feel the same way an easy way to make going to work a little less terrible is to make your wardrobe more fun :) At my work we wear ALL black. Black top pants and shoes, our aprons are even black...

I am sorry but that's a crime!  So I asked my manager (which I strongly suggest you do before you make this) if it was okay if I made a fun and cute waitress apron.  She said yes! :) I was honestly kind of surprised but I wasn't going to question it :) 

This project can be altered to fit your style and you can do as much or as little to it as you want.  I kept mine pretty simple because I know my boss wouldn't be to happy if I went any crazier. This project can also be a no sew.  I recommend finding a strong fabric glue that is a quick dry but you can try hot glue.  I chose to sew because it will be stronger.  


Step one: cut two pieces of fabric 
Piece one: 22" long and 13" tall 
Piece two: 22" long and 7" tall 

I chose two contrasting fabrics but you can use the same if you would like. 


Step Two: Fold over raw edges
Use a one inch seam allowance and mark it on the two short sides and one long side.  
The top will be folded over and the two sides will if that explains it easier. 

Take notice!
For the small rectangle you only need to pick 1 long side to hem the rest can be left alone. 


I just wanted to show you guys how I did it. 
 So fold the side over to the 1" line you marked out 
 Then just fold that in half and iron down. 


Step Three: Sew the folds down
(or glue)


Step Four: Pin right and wrong side together
Usually when you sew you put right sides together but in this case you need to but the RIGHT side of the little rectangle facing down on the WRONG side of the big rectangle 

If you are just gluing yours go ahead and just glue down the three sides of the little rectangle LEAVING THE TOP OPEN!

Step Five: Sew
Just like the gluers did sew the bottom and the two sides and make sure you keep the top open


Step Six: Turn inside out
If you did it right you should have both your right side of your big fabric and ur little fabric facing you. 

(before turing inside out you may have to trim off some access fabric) 


Final step(S): Sew pockets and sides and add ties
See were I marked the lines? sew 2 lines down the little rectangle to make pockets. Your measurements may be different then mine but try to make them even.  

You will also have to go down the edges of the apron because your big rectangle will have fabric that still needs to be folded over.  (you will understand what I mean when you make it) 

Now add a way to tie it! 

You could make your own ties from fabric or just buy some ribbon (that's what I did) Just sew to the edges of your apron and you are officially done!
_______________________________________________________________________

Well there you have it! I really really really hope that wasn't to confusing.  I was trying to simplify it as best as I could.  If you have any questions just comment and I will try my best to answer them! 

If you attempt to make this or your own version I would LOVE to see it.  Tag me in a picture of it on instagram @DIYNATION7797

Wednesday, July 2, 2014

DIY: Fabric covered trash can

Fabric Covered trash Can

This is a great DIY if you are looking to add some updates to your room without breaking the bank. I just used a trashcan we had on hand as an easy way to change our surroundings :) Sometimes you need a little change in scenery and the easiest way to do that is REDUCE REUSE AND RECYCLE! :D


Supplies:
  • Trash can 
  • Fabric of choice
  • Other decorators like ribbons bows flowers jewels ect Get Creative with it!
  • hot glue gun 
  • Felt
  • Scissors 
  • Measuring tape


Look how ugly this thing is^ 
I think my mom has had it since she got married it was in desperate need for an update 


You need to get the correct amount of fabric so measure the height of the trashcan and the distance all the way around.  Add 2" to the measurements so that way you have room to tuck in raw edges.  


Mine got smaller at the bottom so I took three all the way around measurements so that way it would conform to the can better.  This is optional it wont be a big deal if you do not do this. 


1. Fold down the raw edges and glue it down the trash can


2. Fold the fabric over the top of the can 
You do not have to hide these frayed edges because we are just going to line it with ribbon later


3. Glue all the way around the can until you meat your original side of fabric.  Again tuck in the raw edges and glue down overlapping the first side.  


Now for the bottom.. 


4. Pucker the excess fabric and glue down to the bottom making sure you pull tight and fold over 
If you are new to DIY this might take a little practicing but you just have to remember you can manipulate the fabric however you want just keep pulling tugging folding and gluing 


5. Finally trace the bottom of the can on the felt cut out and glue over all the nasty raw edges 

6. Remember in the begging how we folded the edges over the top? Now all you need to do is take quarter inch ribbon or whatever size will cover your edges and glue it down over the frayed edges.  

Simple enough? ... I hope? 


If you enjoyed this project enough to make one f your own or a verson like it I would love to see it.  Tag me in a picture of it on instagram @DIYNATION7797

Monday, June 9, 2014

DIY: Watermellon American flag shirt

DIY: Watermelon American Flag T-shirt 
This is a great way to recycle an old t-shirt and an easy way to get rid of awkward fabric scraps you have laying around.  My inspiration was a watermelon but you could use any color combo you would like.  

Cuttin to the chase: 
I will go into detail how I made this step by step but for those of you who are just going to skip threw and look threw the pictures and go on your own here is the short version of what I did.  
1. Gathered scraps 
2. Placed in desired form 
3. sewed in place 
4. Drew on "watermelon seeds"

For the rest of you I will go into detail step by step with pictures :) 


Supplies:
  • Fabric scraps (red pink and green for watermelon)
  • T-shirt 
  • Fabric markers or paint 
  • Sewing machine or sewing needle in thread


Step One: Place your fabric scraps

There is no right or wrong way to do this guys just go crazy and get an idea of what you want it to look like.  


Step two: Sew down

If you feel more comfortable pinning yours down that is fine but I wanted a very frayed crazy organic look so I just started tacking down with no particular meaning.


Step Three: Draw "watermelon seeds"
Again no rhyme or reason just add the effect of watermelons.  Also keep in mind your maker or paint you use cannot be washable because when you put it in the washer it will just wash right out.


Step four: Cut sleeves 
This step is completely optional but I was going for a very ragged look and I wanted a tank style.  Maybe try a crop top style?


I paired it with high waisted Gingham shorts I thrifted for 99 cents and a fruit patterned bow I made. 


Hope you guys enjoyed it! If you happen to make this project or a similar project I would LOVE to see it.  Tag me in pictures of it on instagram @diynation7797


Thursday, May 8, 2014

DIY: Recycled Plastic Egg Flower Painting

DIY:
Recycled Plastic Egg Flower Painting 

WARNING: Extremely Easy Project!


 Today's DIY will show you how to make a beautiful flower painting out of those plastic eggs that get hoarded after Easter every year.  I am in love with how posh and anthropology looking this is. I painted mine onto fabric to make into a pillow but you could add this to a canvas or even directly onto a wall.  

SUPPLIES:
  • Something to paint (I did a pillow) 
  • Toilet paper roll 
  • Plastic egg 
  • Paint (your choice of colors)
Ideas other than a pillow to paint:
  • On canvas 
  • A wall 
  • flower pot 
  • t-shirt 
Lets begin... 


Step One:
Make petals 

Just flatten your toilet paper tube down and than cut a strait line than open it up and you now have the perfect shape for a petal. 


Step 1/2: 
Open egg

This will be the center of your flower you can use either side of the egg it wont make a difference as long as it is round.


Step Two:
Dip into paint


Step Three: 
Press firmly 

First put down your circle than add as many petals as you want all the way around. 


All done! 


I added stuffing and made it into a pillow than put it into an Easter basket this year. What are you guys going to do with your recycled egg paintings? 

If you do this project or get inspiration for one like it I would love to see a picture of it so tag me on instagram in a picture of it @DIYNATION7797


Basket of Sunshine


Hey guys! I just want to show you a gift I gave out to one of my best friends. ITS A BASKET OF SUNSHINE! If you love pinterest as much as I do you might have noticed the boxes of sunshine people send out and I just adored them so I decided to make my own for Britt.  If you have a friend with a bubbly wonderful happy personality this is most definitely a good ideal gift for them.  

Maybe this will help give you some ideas on what to put in your own sunshine gift basket. 

So I suppose I should show you the content?


This is a handmade pillow by me! I made the fabric myself and I will be posting a DIY on how to do this yourself right away.  


Thrifted yellow and white striped cardigan


Body wash and Scrubbie


Adorable little bee plates!


Lemonade... its getting warmer out so its perfect!


Paintable wall hanger

A lot of the items are bee related because Brittanys "thing" is Beeeee bold! She used it as her campaign slogan to run for a state FBLA office and I think it works rather well for her. 


Bee sharpie mug! 

If you guys haven't tried the sharpie mug DIY'S yet you sooo need to they are adorable. 


Yellow beauty products 


Here was the back of the basket with my terrible paint job ... I am not much of an artist as you can tell

If you came up with any really cute DIY gifts for anybody I would love to hear about them and if you have a picture of it tag me in the picture on instagram @DIYNATION7797

Friday, May 2, 2014

Recycled Cardboard Ribbon Organizer

Recycled Cardboard Ribbon Organizer 
This project is soooo easy a kindergartner could do it because all it takes is some kindergarten skills.  This is a great way to organize ribbons and lace you have and also still have them on display.  This project is also very cost effective because your using only recycled materials.  


Supplies:
  • Cardboard (recommended cereal box type cardboard)
  • scissors 
  • ruler
  • pen


Notice
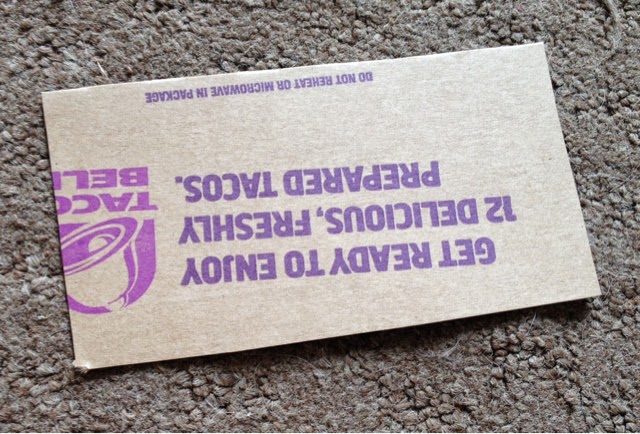
I just used a tacco bell box but some good examples of other cardboard you could use is cereal boxes, cake mix boxes, really anything that is a "light" cardboard. 

 Cardboard boxes do work just the same but these are much easier to cut and trace and work better for best use of space.  


Step One:

Trace your rectangle onto the cardboard.  

The measurements I used were 5" long and 2 and 1/2" wide.  

You can make any shape or size you would like but for me personally was my fave. 


Step Two:

Cut out! 

Simple enough? 

Step Three:
Wrap your fabric around it and stick a pin in it to hold. 

Read bellow for some variations


Variations:

Cut out notches (like the one on the left)
Cut them out of actual cardboard boxes to wrap scrap fabric instead of ribbon 
Cut different shapes like a square instead
Paint them to make them look cuter


Does anyone else have a random notebook were they scribble there ideas down? or document them? This is my notebook I just stuff with random ideas and things to go back to if I know I will be making this again.


Here I am showing you guys a ton of difffernt ways to use these.  
There is one with knotches, one wraped sideways instead of the long way.  There is some that are holding two istead of one, or one holding lace and another more square one instead of wrecktangle.  

Don't waist perfectly good materials! 


These were actually inspired by these vintage ribbons.  Back in the day this is how ribbon and bias tape was bought instead of on a spool.  I like this way better I feel like its easier to store and easier to see what I have and nice and quick to flip threw.  


To store I just put mine in cute little dollar store baskets.  I have about 4 different types of baskets I use to store this type of stuff in my craft room.  

What are some handy ways you guys use to store your scraps and ribbons? 

If you try any of these or any variations I would love to see them.  Tag me in pictures of them on instagram @DIYNATION7797