Showing posts with label Do It Yourself. Show all posts

Sunday, July 20, 2014

DIY: Waitress Apron


DIY: Waitress Apron

Supplies:
  • Fabric (I chose two contrasting fabrics)
  • Scissors 
  • Sewing machine or strong glue 
  • Ribbon
  • Iron

I like many other teenagers work to put gas into our vehicles and because we have no experience in anything big and important we are forced to work minimum wage jobs.  I am one of those teenagers... 

Personally I love waitressing but if you do not feel the same way an easy way to make going to work a little less terrible is to make your wardrobe more fun :) At my work we wear ALL black. Black top pants and shoes, our aprons are even black...

I am sorry but that's a crime!  So I asked my manager (which I strongly suggest you do before you make this) if it was okay if I made a fun and cute waitress apron.  She said yes! :) I was honestly kind of surprised but I wasn't going to question it :) 

This project can be altered to fit your style and you can do as much or as little to it as you want.  I kept mine pretty simple because I know my boss wouldn't be to happy if I went any crazier. This project can also be a no sew.  I recommend finding a strong fabric glue that is a quick dry but you can try hot glue.  I chose to sew because it will be stronger.  


Step one: cut two pieces of fabric 
Piece one: 22" long and 13" tall 
Piece two: 22" long and 7" tall 

I chose two contrasting fabrics but you can use the same if you would like. 


Step Two: Fold over raw edges
Use a one inch seam allowance and mark it on the two short sides and one long side.  
The top will be folded over and the two sides will if that explains it easier. 

Take notice!
For the small rectangle you only need to pick 1 long side to hem the rest can be left alone. 


I just wanted to show you guys how I did it. 
 So fold the side over to the 1" line you marked out 
 Then just fold that in half and iron down. 


Step Three: Sew the folds down
(or glue)


Step Four: Pin right and wrong side together
Usually when you sew you put right sides together but in this case you need to but the RIGHT side of the little rectangle facing down on the WRONG side of the big rectangle 

If you are just gluing yours go ahead and just glue down the three sides of the little rectangle LEAVING THE TOP OPEN!

Step Five: Sew
Just like the gluers did sew the bottom and the two sides and make sure you keep the top open


Step Six: Turn inside out
If you did it right you should have both your right side of your big fabric and ur little fabric facing you. 

(before turing inside out you may have to trim off some access fabric) 


Final step(S): Sew pockets and sides and add ties
See were I marked the lines? sew 2 lines down the little rectangle to make pockets. Your measurements may be different then mine but try to make them even.  

You will also have to go down the edges of the apron because your big rectangle will have fabric that still needs to be folded over.  (you will understand what I mean when you make it) 

Now add a way to tie it! 

You could make your own ties from fabric or just buy some ribbon (that's what I did) Just sew to the edges of your apron and you are officially done!
_______________________________________________________________________

Well there you have it! I really really really hope that wasn't to confusing.  I was trying to simplify it as best as I could.  If you have any questions just comment and I will try my best to answer them! 

If you attempt to make this or your own version I would LOVE to see it.  Tag me in a picture of it on instagram @DIYNATION7797

Wednesday, July 2, 2014

DIY: Fabric covered trash can

Fabric Covered trash Can

This is a great DIY if you are looking to add some updates to your room without breaking the bank. I just used a trashcan we had on hand as an easy way to change our surroundings :) Sometimes you need a little change in scenery and the easiest way to do that is REDUCE REUSE AND RECYCLE! :D


Supplies:
  • Trash can 
  • Fabric of choice
  • Other decorators like ribbons bows flowers jewels ect Get Creative with it!
  • hot glue gun 
  • Felt
  • Scissors 
  • Measuring tape


Look how ugly this thing is^ 
I think my mom has had it since she got married it was in desperate need for an update 


You need to get the correct amount of fabric so measure the height of the trashcan and the distance all the way around.  Add 2" to the measurements so that way you have room to tuck in raw edges.  


Mine got smaller at the bottom so I took three all the way around measurements so that way it would conform to the can better.  This is optional it wont be a big deal if you do not do this. 


1. Fold down the raw edges and glue it down the trash can


2. Fold the fabric over the top of the can 
You do not have to hide these frayed edges because we are just going to line it with ribbon later


3. Glue all the way around the can until you meat your original side of fabric.  Again tuck in the raw edges and glue down overlapping the first side.  


Now for the bottom.. 


4. Pucker the excess fabric and glue down to the bottom making sure you pull tight and fold over 
If you are new to DIY this might take a little practicing but you just have to remember you can manipulate the fabric however you want just keep pulling tugging folding and gluing 


5. Finally trace the bottom of the can on the felt cut out and glue over all the nasty raw edges 

6. Remember in the begging how we folded the edges over the top? Now all you need to do is take quarter inch ribbon or whatever size will cover your edges and glue it down over the frayed edges.  

Simple enough? ... I hope? 


If you enjoyed this project enough to make one f your own or a verson like it I would love to see it.  Tag me in a picture of it on instagram @DIYNATION7797

Tuesday, April 1, 2014

DIY: Tutu Pony Tails

DIY: Tutu Pony Tails 


I am going to show you how to make these adorable tulle tutu looking hair bands.  I got the idea when I found some of those old ponytails that we all used to wear in grade school when we were in like kindergarten. 


The looked like this... some ugly memories coming back? 
Yeah.. same so what I have done was a revamp of these classic ponytails. 

This is a great scrap buster for your left over tulle.  A variation if this could be a great scrap buster for some old ribbon ends you were going to throw away.  


Supplies:

  • tulle (any color desired)
  • Scissors 
  • Pinking Sheers (optional but recommended for best results)
  • ruler/tape measure 
  • ponytail holders 

Step one
Cut your tulle into strips.  

There is no set lenght or width but what I did was cut them about 4" long and 2" wide.  The wider they are the harder they are to tie but to thin and they would get very "fluffy".  To short and they are also hard to tie. 


Step two
Take your strips and wrap them around the pony tail. 

To tie it correctly make a slip knot around the pony.  Go to this link to learn how to wrap them correctly:http://asmallsnippet.com/2010/10/quick-and-simple-tutu.html (go strait to the tying the tulle to the elastic part of the tutorial)  If you have ever made a no sew tutu tie them the same way just in smaller form. 


Step three 
Trim 

Once your entire elastic is covered trim the tulle to the desired length and even all the loose pieces.


All finished! 


My lovely sister helped model some of them :) 

If you make this DIY or your own variation I would love to see it.  Tag me in pictures of it on instagram @DIYNATION7797

Sunday, March 30, 2014

Smash Sunday: Foodie

Smash Sunday: 
Foodie 

Today is Sunday and just like every other Sunday me and my babe Brittany do a smash book page together than blog about them.  Todays theme was food... and boy do I love food! 


I must not be feeling very creative today because honestly this is one of my more boring smash pages.  But I do still like it very much guess I shouldn't have made it on a full stomach? ;) 

This page includes: 
  • Several fun recipes to try
  • Starbucks (mmm chia tea latte) 
  • Green tea wrappers (tea addict) 
  • Icream and various other junk foods 
  • Some organic foods because I always feel better after I eat them 
  • Some strawberry scrap book paper that reminded me of pick-nicks... I am definitely going to have a picknick this summer to blog about it.  
  • I also have a row of sugary drinks... mmmm my fave form of to much calories <3


If you are going to do a smash book on food I would love to see what it looks like, tag me in a picture of it on instagram @DIYNATION7797

Thanks for reading guys! 

Keep reading there will be a new DIY tommorow! Its to die for... 

Wednesday, March 12, 2014

Quickie DIY: T-shirt Scrap no slip hangers


Quickie DIY: No slip hangers
A few days ago I did a DIY with an old t-shirts and the never ending struggle with t-shirt projects is what in the world do you do with all the awkward scraps?! Like the sleeves or the sides and extras that you kind of just hack off the t-shirt.

Well here is a simple solution... cut them into strips and wrap them around your hangers!  In my opinion these work so much better than the actual no slip hangers and there a super easy DIY.

I am sad to say this isn't my own origonal idea but one I stumbled over while surfing youtube for inspiration on t-shirt DIY'S of my own.  If you would like to watch Andriaschoice, the youtube channel were I got this idea go to this link: https://www.youtube.com/watch?v=0Qf_tqGHoy0

\

Here is the DIY I made that has now supplied me with my t-shirt strips to make this project.  If you would like to do this DIY as well (no sew t-shirt pillow) go to this link: http://letmebemeinsperation.blogspot.com/2014/03/quickie-diy-t-shirt-pillow-no-sew.html


In a way this DIY reminds me of the old thing our grandmas used to do were they crochet the hangers to make them pretty and fully functional as no slip hangers.  

Maybe this is a DIY I should have in the future? ... I am completely in capable of crochet no matter how hard I try but maybe it is something I will force myself to learn the art of because I really do want to learn but for the life of me I just am not capable! grrrr! If you can crochet I am surely jealous.  


Supplies: 
  • plain hanger 
  • t-shirt scraps 
  • scissors/rotary cutter 
  • hot glue gun

First step is to cut all of your strips

You are going to have all types of sizes and thicknesses but ANY scrap can be used.  


Next all you simply do is wrap the strips around the hanger.  

You don't have to glue these down with a hot glue gun you can just simply tie them but I feel a more effective way is to add a dab of hot glue for security. 


All done! 

You can choose to wrap the hook half of the hanger I personally did not because I did not believe it was necessary but its your hanger so go crazy! 

Different colored strips can also make these even more fun... even more fun? Not sure if that is proper grammar but you guys probably get what I mean. 


The t-shirt scraps I had left over from just that one project made me this many hangers! 

Tanks for reading guys :) 

Some things to look forward to coming soon... 

In a few days I am going prom dress shopping so I will be sure to document that.  I am thrifting it so it will be quite interesting.  

Also at the end of the week on Sunday I will show you a post of my outfits I wore this week.  I am going to wear a sweater every day so it will be like a super mega ootd but in this case an ootw (outfit of the week) 

I am hoping to maybe have another DIY or posibly two more DIY's by next week. But if I don't please do not hate me forever! They will get up eventually.  I am now officially on spring break so I have a few days to do some DIY's :)  


Sunday, November 3, 2013

Zombies

Last weekend I got the opportunity to go to a book sighing for the book undying. The author Valerie Grosjean graduated from my high school in 2003 and is now an author. The book takes place here in my home town and around my high school.  Also some surrounding areas. She gave me a free signed copy of the book and I would like to point out she signs it in glitter pen :)

vlog about the zombie day of joy :)
http://www.youtube.com/watch?v=cX4MBpPLzEg

keep reading for a review of he book and my DIY on the zombie clothes, also talk about a makeup artist I got to meet. You can also here a short story about me and Brittany's trip to walmart :)

 Now let me get to the fun part.  Me and my girl Brittany were asked to be her zombies for the book sighing. (her book is about zombies) She got a professional makeup artist to do our zombie makeup! coolest experience ever.  The makeup artist was actually the cover model of the book.  So not only did I meet the author of the book get a signed copy and have my makeup done by a pro I also got to meet the model for the book.  She is really cool here is the link to her blog.....http://lauraduvallmakeupartistry.wordpress.com/2013/10/30/undying-by-valerie-grosjean-book-signing-and-zombie-fun/


 She even put this stuff over our teeth to turn them to look all rotten gross and stuff 

 Brittany is the girl in the pink
 

Fear us yet? ;)
The girl on the right was our makeup artist/cover model
 
 
Review of the book undying:  The book was really action packed with a really cute love story.  It wasn't like anything inappropriate it was more action filled but it all tied in together so perfectly.  Also it was very realistic in a way that makes you think wow this really could actually happen in the real world.  Also she is very good at being descriptive there are a few scenes were it talks about the zombies eating the humans or how many dead bodies there are laying around you might get a little sick its awesome.  This book is great for romancers, action seekers, and mystical creature lovers. It will be a series and trust me you will want to keep reading I already cant wait for the next one to come out.  She said she is hoping the next one will be out by next October the wait is gonna be the end of me.  
 
If you want to buy this book the link to get it on amazon is here:
 
With this opportunity I also saw the opportunity for a DIY! :) I do not have a step by step of these because they were very last minuet but let me know if you would like a step by step or something and I would be willing to make more. 
  I started with a plain white button down
 For the bottom half I took an old pair of my dads work jeans
 Here is the finished results!
 back of the button down
finished jeans


WALMART INVASION by: Lizzy Cunningham
 
Right after the book signing Britt and I went to walmart because we did not want to waste this beautiful makeup.  When we got there we got so many different looks.  little kids started to cry people were either laughing and pointing or we got the occasional stare down from some old lady but the best look was from cute guy by the stickers isle.
 
Me and Britt were looking at the stickers because we are going on a trip in a few days to Texas for NFLC. There will be a lot of people there and Britt wanted to get stickers to pass out to people.  aint she adorable! okay back to cute guy by the sticker isle.  we are looking at stickers and all of a sudden this guy walks buy (very attractive) but like every three steps he would like turn back and look at us so I just kept staring him down to see what he would do and all of a sudden he makes a U-turn and comes back in our direction. 
 
Now I feel really awk so I actually look away and am all like Brittany what do we do! He comes up to us and is all like so did you guys just get here from like a zombie fest or something? Me and Britt look at each other and laugh and explain.
 
He stalked us the rest of the time we were at Wal-Mart and just "happened" to run into us a few times and start up a conversation.  He actually left at the exact same time as us to.
 
I miss you cute guy in the sticker isle!!!!! <3 wherever you are. 


Friday, June 28, 2013

DIY animal bulletin board


Animal bulletin board DIY


        Supplies:

            cork board

                 outside fabric (pretty fabric)

                 backing of some sort ( felt, poster board, cardboard)

                 tacky glue

                 Laptop with printer

                 Glue gun

                 scissors


 First you need to pick your image.  It doesn't have to be an animal it can be a shape or a silhouette. I will now explain how you get the image
 
1. go to google images and figure out what image you want for a board. I would recommend something with not a hole lot of detail that would work best. Type in the google search your silhouette you are looking for take for example I typed in elephant silhouette. 
 
2. Once image is picked save it to your desktop for easy excess
 
3. Open up paint on your computer and post the image in it. The reason we are using paint is because if you are anything like my mother you don't want to waist a ton of ink so we are going to white out the middle of the picture and keep the outline.  To white out the middle is very simple.  

4. Go to the paint bucket and select it.  Than you will need to select the white color drag the paint bucket over to the middle of the image and click it.  While doing this if by change it whites out part of your outline just simply get the draw tool and draw the line back in. If it does not white out the hole thing get the paint brush and you will have to do it manually
 
The complicated part is almost over I promise
 
5. Now that the image is just the outline save it back to your desktop.
 
6. Open Microsoft office and copy your picture from your desktop to office.
 
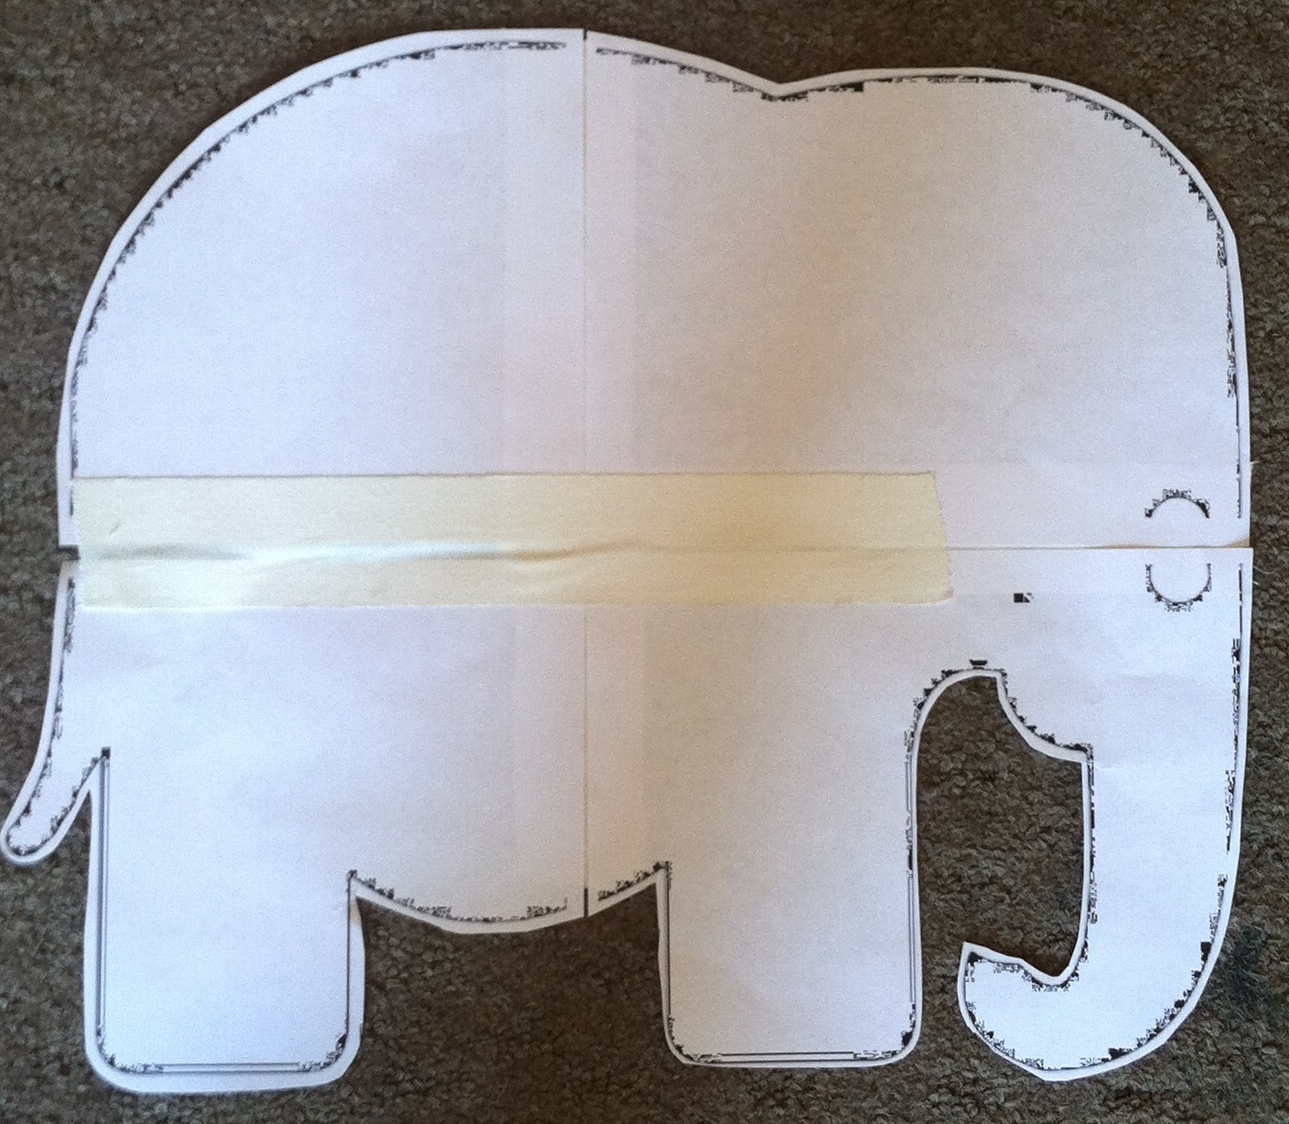
7.   Now we need to blow the image up so it is a big enough space to hole any of the things you want to put on the board so to do that we will spread the image out onto 4 different sheets. Once you have the image in office you will change the layout to 13.898 x 9.843.
 
8. this will spread the image onto 4 different pieces of paper to blow it up. Spread the image as large as you can on the sheet than go to print preview to see if that is how big you want it. 
 
9. Print out the 4 sheets
 

10. Now time to use those skills you learned back in second grade. cut the silhouette out.


            11. Trace image onto cork board     


 12. Trace image onto the fabric. The fabric you will not trace the exact shape you need to have more fabric than you do the shape so leave about 2" extra from the actual shape.


13. Cut both fabric and cork board out
 
14. Cover the cork board in tacky glue. Make sure you don't drown the cork board in the glue because then it will soak threw the fabric and make spots that look like grease stains.
 
 
15. Flip cork board over. Start cutting slits into the excess fabric all way around the hole thing .


Like this ^
 
 
16. Take your hot glue gun and glue down all of the fabric pieces on the side of the cork board that there is no fabric. Try to move with the fabric so that way the edges stay nice and crisp with no gathering of any type.
 
 
This is what it will look like when it is done^
 
 
17. clue your cork board down onto your backing of choice and cut around the edges for a nice clean finish. ( I chose cardboard makes it really sturdy)
 
Viola!